Brazed vs Sintered Diamond Tools for Metalworking: Longer Tool Life for Stainless Steel and Aluminum
30 03,2026
UHD
Product Comparison
Tool life is a primary driver of productivity and total machining cost in metalworking. This article objectively compares brazed and sintered diamond tools through the lens of their bonding mechanisms and resulting microstructures, explaining how these fundamentals impact grit retention, thermal stability, shock resistance, and wear behavior. Using representative shop-floor scenarios in stainless steel and aluminum alloys, it summarizes measured life differences—typically a 30%–50% increase in service life for brazed diamond tools under demanding conditions—alongside the tradeoffs that influence process reliability. To support faster, lower-risk selection, the article includes a microstructure comparison diagram (e.g., SEM-style bonding schematics), a decision-tree for matching tool technology to workload, and practical maintenance guidance (coolant selection, feed optimization, and heat management). The goal is to help engineers, buyers, and production managers reduce downtime, improve equipment utilization, and achieve better cost performance with the right diamond tool process choice.
Brazed vs. Sintered Diamond Tools: A Practical Way to Extend Tool Life in Metalworking
In metalworking, diamond-tool “life” is rarely a single number—it is a mix of wear stability, edge integrity, and how often the line must stop for dressing or tool change. When production teams switch between brazed diamond tools and sintered diamond tools, they are often choosing between two bonding philosophies that directly affect grit retention, heat resistance, and impact tolerance. For many stainless and aluminum applications, field data commonly shows ~30%–50% longer usable life with brazed structures—when the process window is correctly set.
Why this comparison matters (buyer reality)
Engineers and buyers are typically not chasing “the hardest tool.” They want a tool that reduces downtime, keeps surface finish consistent, and improves equipment utilization without requiring constant parameter babysitting. Bonding method is the hidden variable behind those outcomes, especially when heat spikes, interrupted cuts, or burr-loaded chips enter the picture.
The essential difference: how each process holds diamond grit
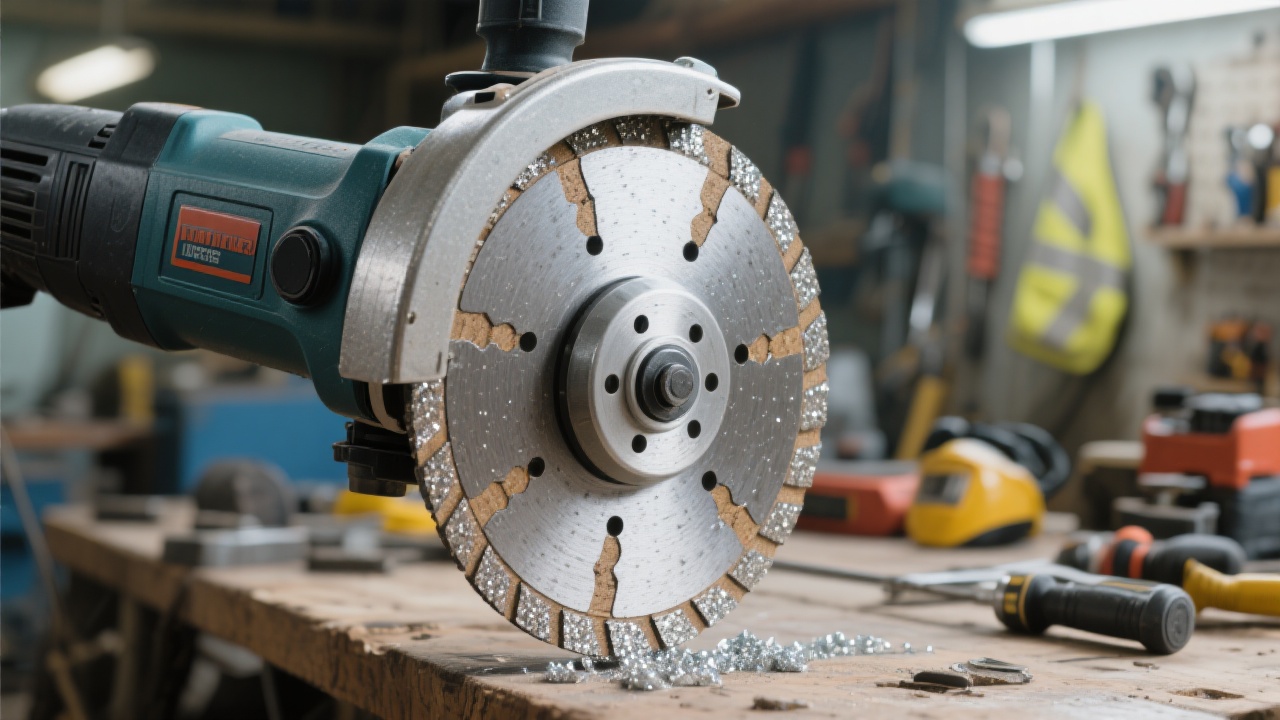
Brazed diamond tools (single-layer, high exposure)
Brazing metallurgically joins diamond grit to a steel body using a brazing alloy (often Ni-based). The result is typically a single-layer grit arrangement with high protrusion. In practice, high protrusion improves chip space and cutting aggressiveness—valuable on gummy aluminum and on stainless where heat and work-hardening punish dull edges.
Grit retention: strong mechanical + metallurgical anchoring; lower risk of early “pull-out” when parameters are stable.
Cutting behavior: sharper initial bite, less rubbing; often lower cutting forces at comparable MRR.
Typical best fit: operations where heat and loading are the main killers (stainless, aluminum alloys, high-speed deburring/grinding).
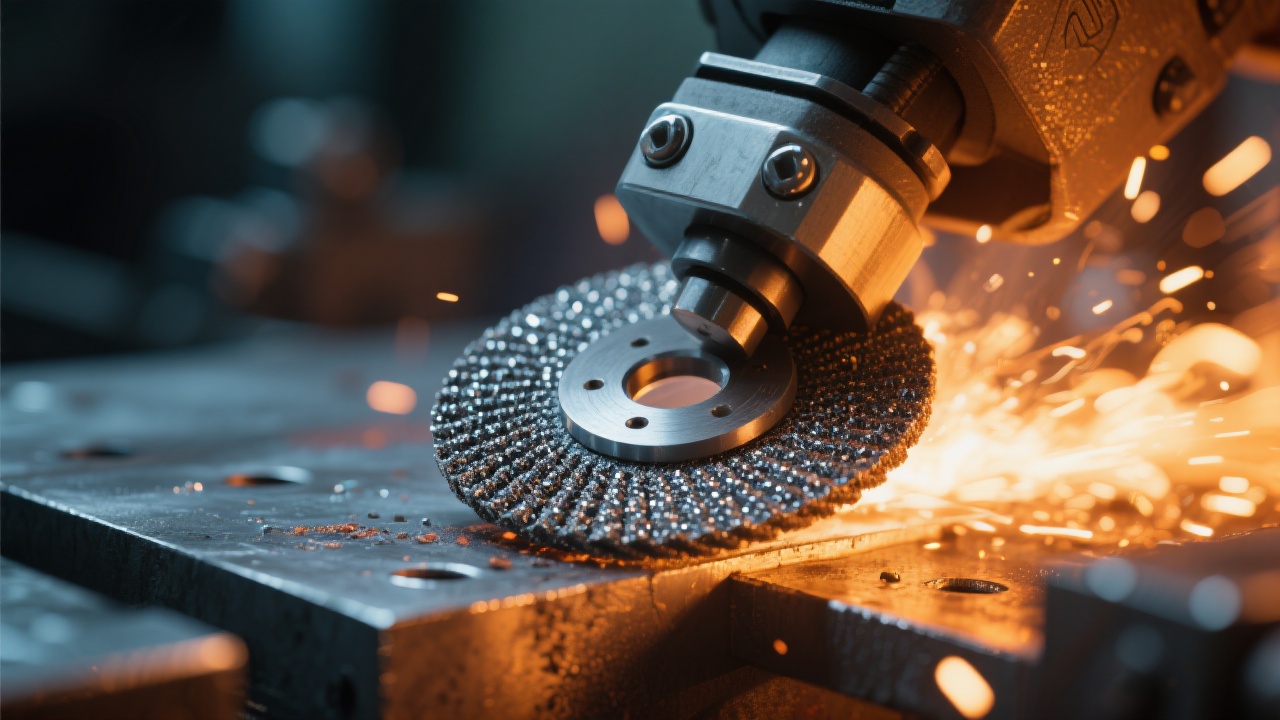
Sintering mixes diamond with metal powders and consolidates them into a matrix. As the tool wears, new diamond is exposed—this can be beneficial for long runs when the process is stable and the matrix is correctly matched to the work material.
Cutting behavior: more “forgiving” over time; can require dressing/conditioning in some setups.
Typical best fit: continuous contact, lower impact, where gradual wear and self-exposure are desirable.
Performance comparison that affects cost per part
Metric (what production feels)
Brazed diamond tools
Sintered diamond tools
Heat stability at the cutting zone
Often stronger early-life cutting (less rubbing), lower risk of heat-driven glazing; requires correct coolant strategy for peak life
Matrix may insulate/retain heat; can glaze under stainless work-hardening if parameters are too light
Impact tolerance (interrupted contact)
High grit anchoring; performs well if grit size and exposure are matched to impact level
Can be robust, but brittle behavior may appear if matrix is too hard or porosity is poorly controlled
Wear mode (what ends the tool)
Mainly diamond dulling/polish; less frequent grit pull-out in stable conditions
Matrix wear + grit shedding or glazing; may need dressing to restore bite
Typical field life outcome (reference range)
~30%–50% longer in stainless/aluminum when coolant + feed are optimized
Stable life in continuous operations; may drop sharply if glazing occurs or if matrix mismatch exists
Reference ranges reflect common shop-floor outcomes reported in metal deburring, grinding, and edge-prep operations; actual results vary by grit size, bond alloy/matrix, coolant, and machine rigidity.
Real metalworking scenarios: what changes in stainless vs. aluminum
Stainless tends to punish tools that slip from cutting into rubbing. When the abrasive stops “biting,” the surface work-hardens, forces rise, and temperatures spike. In many plants, this is where brazed diamond tools shine: their higher protrusion can maintain chip evacuation and reduce the time spent in a polishing regime.
Reference outcome (typical): In stainless edge conditioning and weld blending, switching from a general-purpose sintered wheel to a correctly matched brazed tool frequently delivers ~35%–50% more parts per tool while maintaining finish consistency, primarily by delaying glazing and reducing rework passes.
Scenario B — Aluminum alloys (6xxx/7xxx): loading, chip welding, and surface smearing
Aluminum’s challenge is not hardness—it is adhesion. If chips weld to the tool, friction surges, heat grows, and “mystery” tool wear accelerates. Brazed diamond tools often provide larger chip pockets and a cleaner cutting action, which can reduce loading and keep the cut stable at higher throughput.
Reference outcome (typical): For aluminum deburring and edge rounding, users commonly report ~30%–40% longer tool life plus fewer stoppages for cleaning—an immediate win for reducing downtime and raising equipment utilization.
Expert viewpoint: “Most ‘diamond tool problems’ we see on stainless aren’t diamond problems—they’re heat and rubbing problems. The right bond structure keeps the process in cutting rather than polishing, which is where life and consistency come from.”
A fast selection decision tree (shop-floor usable)
Use this as an early-stage filter for diamond abrasive tool selection. It won’t replace trials, but it will prevent costly mismatches.
Step 1: Is the operation prone to loading (chip welding) or glazing (rubbing heat)?
Step 2: Is contact mostly continuous with predictable wear and you prefer “self-renewing” behavior?
Yes → consider sintered diamond tools (multi-layer exposure as the matrix wears)
No / intermittent shocks → proceed to Step 3
Step 3: Is the line most sensitive to tool-change stops?
Yes → prioritize the option proven to extend stable life in your material (often brazed in stainless/aluminum)
No → optimize for finish, tolerance, and consumable planning; either can work with correct spec
Maintenance & parameter tips that protect tool life (and prevent false comparisons)
Coolant strategy: choose “heat control” over “just lubrication”
For stainless and aluminum, temperature spikes often decide whether diamond keeps cutting or starts polishing. A consistent coolant delivery (flow to the actual interface, not the guard) can materially delay glazing and loading.
Stainless: prioritize cooling capacity and stable flow; inconsistent coolant often shows up as sudden life drop.
Many premature failures come from conservative parameters that keep the tool in contact without real cutting. The counterintuitive fix is often a controlled increase in feed (or depth of engagement) so grit fractures the chip rather than polishing the surface.
Symptom: micro-chipping from shocks → reduce impact via steadier engagement or adjust grit size/exposure.
Conditioning & cleaning: stop measuring “life” against a dirty tool
Aluminum loading can mimic wear. A tool that appears “dead” may be recoverable after proper cleaning, restoring cutting action and keeping the line running with fewer unplanned stops—directly supporting better cost-per-part.
Set a quick inspection routine (chip adhesion, glazing, discoloration) before declaring end-of-life.
Standardize “stop criteria” (amperage, finish threshold, part count) to compare brazed vs. sintered fairly.
Want a faster path to longer tool life in stainless or aluminum?
If your goal is to reduce downtime, improve equipment utilization, and reach a more predictable cost-per-part, a specification-based tool recommendation beats guesswork. UHD supports metalworking teams by aligning bond type, grit, and exposure to real shop conditions.
Share your material, operation type, and coolant setup to receive a practical match recommendation and a parameter checklist for stable life.
Common buyer questions (what teams ask before approving trials)
Is brazing always better for metalworking?
No. Brazed tools often outperform in heat/load-driven scenarios and when a sharper, more open cutting action is needed. Sintered tools can be excellent where wear is continuous and predictable, and where a multi-layer structure supports long, stable runs.
What causes the biggest “life gap” between brazed and sintered tools?
Typically: heat management (coolant reach/consistency), parameter choice that avoids rubbing, and the match between grit exposure and chip evacuation. In stainless and aluminum, those variables can easily swing life results by 20%+.
How should a plant run a fair comparison trial?
Keep the same machine, same coolant, and same inspection interval; define stop criteria (amperage, finish threshold, or part count); and record failure mode (glazing, loading, pull-out, chipping). Without this, the trial becomes a workflow test rather than a bond-technology test.


.png?x-oss-process=image/resize,h_1000,m_lfit/format,webp)
.png?x-oss-process=image/resize,h_1000,m_lfit/format,webp)


